
Sweet Treats

Instructions
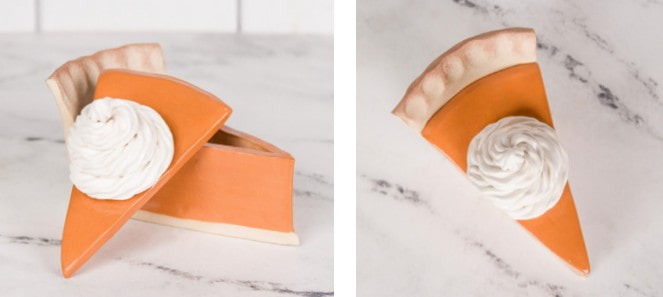
Use hand-building techniques like coiling, slab construction, and sculpting to dive into the playful yet bold spirit of Pop Art, creating your very own sweet treats in Claes Oldenburg’s style. To bring creations to life, use Mayco Fundamentals® Underglazes. The large selection of bright fun colours will certainly put the POP into your sweet treat Pop Art!
Clay Building Process:
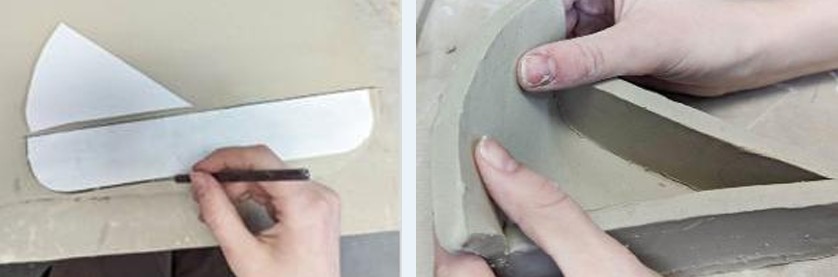
- Begin by sketching your sweet treat, Cut the template pieces from a ¼” slab, compressed with a rib. Assemble the form by joining the walls into an “A” shape. Press the walls down into the base and rock the form back to create the back wall. Slip and score all attachments. Trim away any excess.
- Compress the base and softly round the back wall. Weld all seams. Softly pinch along the upper crust and trim away any excess with a wet Fetting knife.
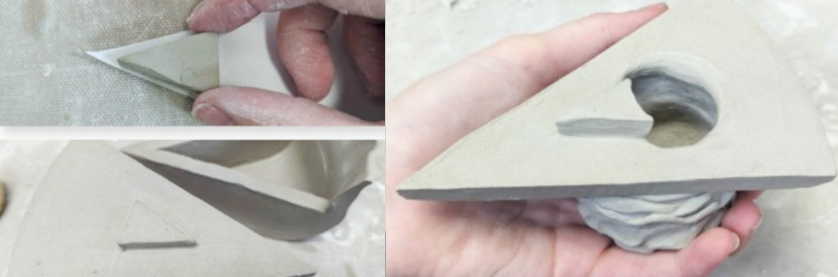
- Create a simple flange by using the paper template to cut a small triangle with the same angles. Attach it to the underside of the lid.
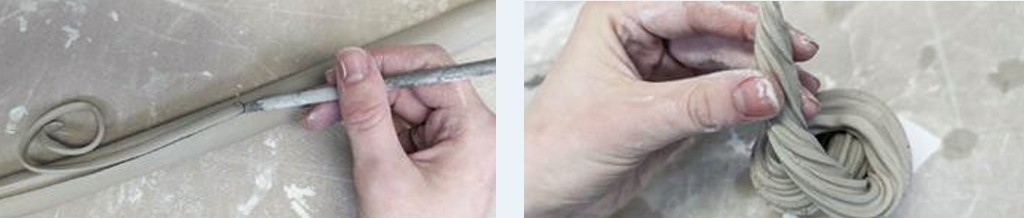
- Roll a coil and use a loop tool to cut away ribbons. Gently twist the textured coil and form a swirl shape, using the paper template to ensure the correct size.
- Repeatedly tap the swirled coil onto the table until it is firmly settled. Use a damp brush to smooth cracks and manipulate the peaks of whipped cream.
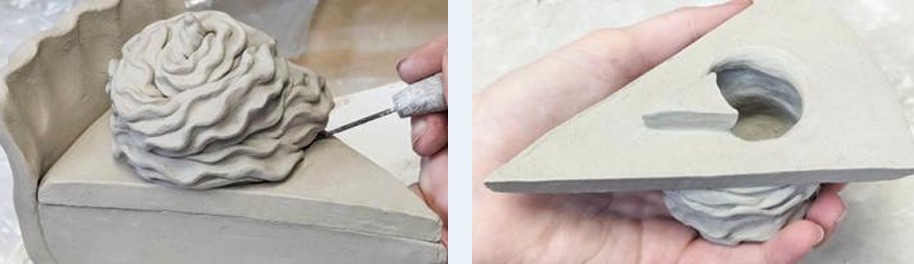
- When the whipped cream is leather hard, hollow it out from the underside with a loop tool and firmly compress the inside.
- Mark where the whipped cream sits on the lid and use the markings to cut a hole. Be careful not to disturb the flange! Attach the whipped cream by slipping, scoring, and welding seams. Allow to dry slowly with the lid on and Bisque fire to cone 04.
Glazing Process:
- Fundamentals® Underglazes will fire matte. For additional depth and shine, apply a glossy clear glaze to transform the matte finish or combine for a stunning contrast. Fundamentals® may be co-fired with a clear glaze in a single firing to save time in the classroom.
- The project could also use Mayco Stroke and Coat Glazes, These fire to a gloss finish so you would bisque fire your pieces to cone 04 and then apply the glaze before re-firing to a minimum of cone 06 up to cone 6.
Download PDF: Sweet Treats - Clay Lesson Plan
×
![]()
Copyright © 2026 Ceramicraft All rights reserved.
We accept:


