
Wind Blown House

Instructions
Mayco’s Foundations® Glazes are perfect for this project. Create Wind-Blown Ceramic Houses that reflect the impact of wind on architecture. Start by brainstorming and sketching ideas, then make paper templates before working with clay to manipulate textures and shapes.
Begin by sketching your wind-blown house, focusing on how the wind will alter the structure (tilted walls, bent roof, etc.). Keep in mind the overall proportions and shape. Cut out the shapes to create a template for your slab pieces. Exaggerate bends or curves in the shapes to reflect the wind’s effect on the house.
Clay Building Process:
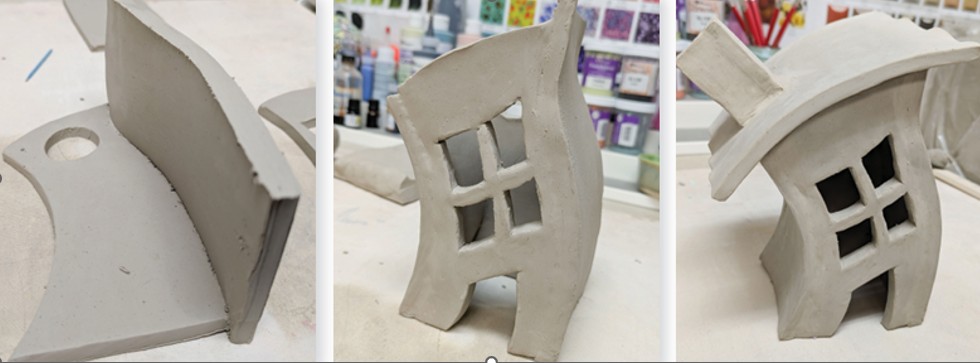
- Roll out clay slabs to an even thickness (about 1/4 inch thick) using a rolling pin, large enough to accommodate your card shapes.
- Use a clay knife or needle tool to cut out the shapes and then score the edges of the slabs where they will be joined.
- Begin assembling the house by standing up the walls and pressing them together along the scored and slipped edges. While the clay is still soft, gently push, bend, or warp sections of the walls and roof to exaggerate the wind-blown effect. For example, you might curve the walls or make the roof appear as though it’s lifting or collapsing under the force of the wind. Attach the roof last, allowing it to sit in a tilted or wind-swept position. Reinforcing connections as needed by adding extra clay coils along the seams
- Use tools like sponges, wire brushes, or loop tools to add textures that enhance the wind-swept appearance, such as cracks, grooves, or swirling patterns. You can also add details like windows or doors that appear partially broken or shifted by the wind.
- Carefully refine the details of your house, smoothing any rough edges or cracks. Make sure there are no weak spots in the structure. Let the house dry slowly and evenly to avoid cracking, covering it lightly with plastic if needed.
- Once completely dry, the house is ready for its first (bisque Cone 04) firing in the kiln.
Glazing Process:
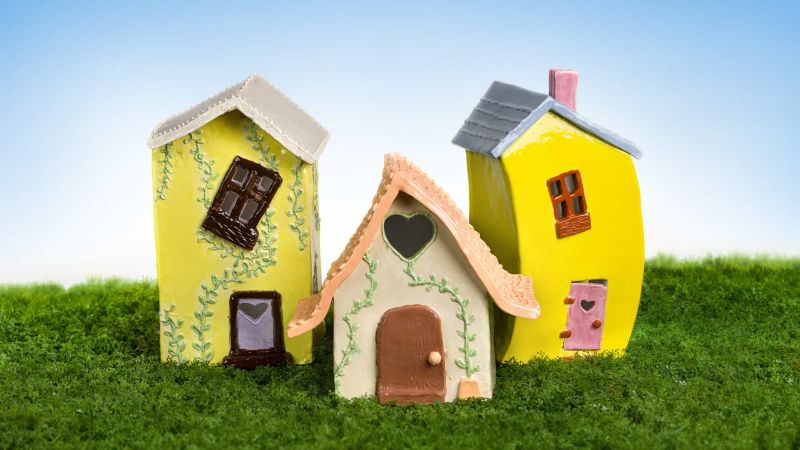
- After the bisque firing, apply glaze to the house. Use colours and techniques that enhance the weathered, wind-blown effect, such as sponging on glaze or layering for a worn look. When applying glaze, use colors and techniques that enhance the weathered, wind-blown effect, such as sponging on glaze or layering for a worn look.
- Fire the glazed piece in the kiln for the final time, completing your wind-swept ceramic house.
You can purchase the Mayco glaze kit or individual bottles to suit your design and colour choices.
Download Lesson Plan PDF: Wind Blown House - Clay Lesson Plan

